
九保すこひです(フリーランスのITコンサルタント、エンジニア)
さてさて、私は少しだけ長くこの業界にいるんですけど、それでもまだ「おっ、そんなのあるんだ😯」という情報に出会ったりもします。
今回出会ったのは大好きなLaravelに標準搭載されている機能なんですが、どうやら独自に拡張できるようになっているらしいんです。
その機能は・・・・・・
Storage 機能
です。
Storage機能は、ファイルを簡単に保存したり取り出したりできる機能なんですが、パッケージをインストールするだけでAWSのS3にだってアップロード&ダウンロードができるようになるスグレモノです。
そして、今回はこのStorageを使って「ファイルが保存されたら自動的にパスワード付き zip 化」するようにしたくなったんですね。
つまり、以下のようにして「パスワードつきzip」をつくりたいんです。
Storage::disk('password_zip')->put($file_name, $contents); // 👈 自動でパスワードつき zip が保存される
そこで❗
LaravelのStorageを独自に拡張して、「パスワードつき zip」が自動で作成される機能を実装してみることにしました。
ぜひ何かの参考になりましたら嬉しいです。😄✨
 「電子帳簿保存法、
ガチでめんどう…
みんな、ホントにやるの??」
開発環境:
目次
独自の FilesystemAdapter をつくる
では、いきなりですがStorageを「パスワードつき zip」に対応した独自のアダプターをつくっていきましょう。
app/Filesystem/PasswordZipAdapter.php
<?php

namespace App\Filesystem;

use Illuminate\Support\Str;
use League\Flysystem\Config;
use League\Flysystem\FileAttributes;
use League\Flysystem\FilesystemAdapter;
use ZipArchive;
use Exception;

class PasswordZipAdapter implements FilesystemAdapter
{
    public function __construct()
    {
        $this->password = config('filesystems.disks.password_zip.password');

        if(Str::length($this->password) < 8) {

            throw new Exception('パスワードは8文字以上で設定してください。');

        }
    }

    // テキストから保存する場合( put() など )
    public function write(string $path, string $contents, Config $config): void
    {
        $this->makeZipFile($path, $contents);
    }

    // ファイルから保存する場合( putFile(), putFileAs() など )
    public function writeStream(string $path, $contents, Config $config): void
    {
        $this->makeZipFile($path, $contents);
    }

    public function read(string $path): string
    {
        $zip_path = $this->getRootPath($path .'.zip');

        $zip = new ZipArchive();
        $zip->open($zip_path);
        $zip->setPassword($this->password);
        $contents = $zip->getFromIndex(0);
        $zip->close();

        return $contents;
    }

    private function getRootPath(string $path = ''): string
    {
        $root_path = config('filesystems.disks.password_zip.root');

        if(! file_exists($root_path)) {

            mkdir($root_path, 0777, true);

        }

        return $root_path .'/'. $path;
    }

    private function makeZipFile(string $path, mixed $contents): bool
    {
        $filename = basename($path);
        $zip_path = $this->getRootPath($path .'.zip');
        $tmp_path = tempnam(sys_get_temp_dir(), 'zip_');
        file_put_contents($tmp_path, $contents);

        try {

            $zip = new ZipArchive();
            $zip->open($zip_path, ZipArchive::CREATE);
            $zip->setPassword($this->password);
            $zip->addFile($tmp_path, $filename);
            $zip->setEncryptionName($filename, ZipArchive::EM_TRAD_PKWARE);
            $zip->close();

            @unlink($tmp_path); // 元ファイルを削除

        } catch (Exception $e) {

            throw $e;

        }

        return true;
    }

    // 以降は、今回実装しない部分ですが Flysystem で必要なメソッドなので残しています
    public function fileExists(string $path): bool
    {}

    public function directoryExists(string $path): bool
    {}

    public function readStream(string $path)
    {}

    public function delete(string $path): void
    {}

    public function deleteDirectory(string $path): void
    {}

    public function createDirectory(string $path, Config $config): void
    {}

    public function setVisibility(string $path, string $visibility): void
    {}

    public function visibility(string $path): FileAttributes
    {}

    public function mimeType(string $path): FileAttributes
    {}

    public function lastModified(string $path): FileAttributes
    {}

    public function fileSize(string $path): FileAttributes
    {}

    public function listContents(string $path, bool $deep): iterable
    {}

    public function move(string $source, string $destination, Config $config): void
    {}

    public function copy(string $source, string $destination, Config $config): void
    {}
}
ちなみに今回の「パスワード付きzip」ドライバーは以下のようにして使いますが、それぞれwrite()とwriteStream()が呼ばれ、最終的にはmakeZipFile()で合流するように設計しています。
・write() が呼ばれる場合
Storage::disk('password_zip')->put($file_name, $contents);
・writeStream() が呼ばれる場合
Storage::disk('password_zip')->putFileAs('', $file, $file_name);
また、コードが入っていない箇所がありますがこれは通常のStorageが使えるので省略しています。
AppServiceProvider へ登録する
では次に、先ほどのPasswordZipAdapterを有効にします。
app/Providers/AppServiceProvider.php
<?php

namespace App\Providers;

use Illuminate\Contracts\Foundation\Application;
use Illuminate\Filesystem\FilesystemAdapter;
use Illuminate\Support\Facades\Storage;
use Illuminate\Support\ServiceProvider;
use League\Flysystem\Filesystem;
use App\Filesystem\PasswordZipAdapter;

class AppServiceProvider extends ServiceProvider
{
    /**
     * Register any application services.
     */
    public function register(): void
    {
        //
    }

    /**
     * Bootstrap any application services.
     */
    public function boot(): void
    {
        Storage::extend('password_zip', function (Application $app, array $config) {

            $adapter = new PasswordZipAdapter();

            return new FilesystemAdapter(
                new Filesystem($adapter, $config),
                $adapter,
                $config
            );

        });
    }
}
コンフィグに登録する
そして、コンフィグに必要な情報をセットしましょう。
config/filesystems.php
// 省略

'disks' => [

    // 省略

    'password_zip' => [
        'driver' => 'password_zip',
        'root' => storage_path('app/password_zip_files'), // 👈 ルートフォルダ
        'password' => 'my-password', // 👈 本来は .env で管理する
    ],
コントローラーをつくる
では、ここまでで作った独自ファイルシステムをコントローラーにセットしていきます。
以下のコマンドを実行してください。
php artisan make:controller PasswordZipController
するとapp/Http/Controllers/にファイルが作成されるので中身を以下のようにします。
app/Http/Controllers/PasswordZipController.php
<?php

namespace App\Http\Controllers;

use Illuminate\Http\Request;
use Illuminate\Support\Facades\Storage;

class PasswordZipController extends Controller
{
    public function create()
    {
        return view('password_zip.create');
    }

    public function store(Request $request)
    {
        // 注: バリデーションは省略しています

        if($request->hasFile('image')) {

            $file = $request->file('image');
            $file_name = $file->getClientOriginalName();

            // ファイルをパスワード付き zip ファイルにして保存
            Storage::disk('password_zip')->putFileAs('', $file, $file_name);

            // 画像データを取得
            $image_data = Storage::disk('password_zip')->get($file_name);

            return response($image_data)->header('Content-Type', 'image/jpeg');

        } else if($request->has(['file_name', 'contents'])) {

            $file_name = $request->file_name;
            $contents = $request->contents;

            // ファイルをパスワード付き zip ファイルにして保存
            Storage::disk('password_zip')->put($file_name, $contents);

            // テキストデータを取得
            $contents = Storage::disk('password_zip')->get($file_name);

            return response($contents)->header('Content-Type', 'text/plain');

        }
    }
}
なお、今回はテストですので、一旦パスワードつきzipとして保存しますが、すぐにその中からデータを取り出してreturnするようにしてます。
ビューをつくる
続いて先ほどのコントローラーでセットしたビューをつくります。
以下のコマンドを実行してください。
php artisan make:view password_zip.create
すると、resources/views/password_zip/にファイルが作成されるので中身を次のようにします。
resources/views/password_zip/create.blade.php
<!DOCTYPE html>
<html lang="ja">
<head>
    <meta charset="UTF-8">
    <meta name="viewport" content="width=device-width, initial-scale=1.0">
    <title>Laravel Sample Form</title>
    <script src="https://cdn.tailwindcss.com/3.3.5"></script>
</head>
<body class="bg-gray-100 p-8">
<div class="max-w-md mx-auto">
    <!-- テキスト送信フォーム -->
    <form action="{{ route('password_zip.store') }}" method="POST" class="bg-white shadow-md rounded px-8 pt-6 pb-8 mb-4">
        @csrf
        <div class="mb-4">
            <label class="block text-gray-700 text-sm font-bold mb-2">ファイル名</label>
            <input name="file_name" type="text" class="shadow appearance-none border rounded w-full py-2 px-3 text-gray-700 leading-tight focus:outline-none focus:shadow-outline" required>
        </div>
        <div class="mb-4">
            <label class="block text-gray-700 text-sm font-bold mb-2">テキスト</label>
            <input name="contents" type="text" class="shadow appearance-none border rounded w-full py-2 px-3 text-gray-700 leading-tight focus:outline-none focus:shadow-outline" required>
        </div>
        <div class="flex items-center justify-between">
            <button type="submit" class="bg-blue-500 hover:bg-blue-700 text-white font-bold py-2 px-4 rounded focus:outline-none focus:shadow-outline">
                送信
            </button>
        </div>
    </form>

    <!-- ファイル送信フォーム -->
    <form action="{{ route('password_zip.store') }}" method="POST" enctype="multipart/form-data" class="bg-white shadow-md rounded px-8 pt-6 pb-8 mb-4">
        @csrf
        <div class="mb-4">
            <label class="block text-gray-700 text-sm font-bold mb-2">ファイル</label>
            <input name="image" type="file" class="shadow appearance-none border rounded w-full py-2 px-3 text-gray-700 leading-tight focus:outline-none focus:shadow-outline" required>
        </div>
        <div class="flex items-center justify-between">
            <button type="submit" class="bg-blue-500 hover:bg-blue-700 text-white font-bold py-2 px-4 rounded focus:outline-none focus:shadow-outline">
                送信
            </button>
        </div>
    </form>
</div>
</body>
</html>
ルートをつくる
では、最後にルートです。
routes/web.php
use App\Http\Controllers\PasswordZipController;

// 省略

Route::prefix('password_zip')->controller(PasswordZipController::class)->group(function(){

    Route::get('create', 'create')->name('password_zip.create');
    Route::post('store', 'store')->name('password_zip.store');

});
これで作業は完了です。
お疲れ様でした😄✨
ちなみに:IDE に「ZipArchive」の警告がでる場合
私の場合phpstormを愛用しているのですが(最近はCursorも人気あるみたいですね)ZipArchiveを使うと警告がでるようでした。
特に実行には影響ないので気にならない場合はスルーしていいと思うんですけど、以下のようにすると警告が消えましたので、気になる人はぜひやってみてください。
composer.json
"require": {

  # 省略

    "ext-zip": "*"
},
テストしてみる
では、実際にテストしてみましょう。
まずはブラウザで「http://******/password_zip/create」へアクセスします。
すると、以下のようなフォームが表示されます。

では、まずは上のフォーム(文字からStorageファイルを保存するパターン)へ以下のように入力して送信してみましょう。

すると・・・・・・
![]()
はい❗
今回はパスワード付きzipをつくってすぐに中身を取り出し、その内容を表示するようにしているので、送信したテキストが表示されました。
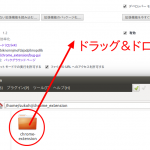
そして、Storageフォルダを見てみると、以下のファイルが作成されていました。
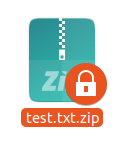
では、早速中身を見てみましょう。
はい❗
パスワードで保護されていました。
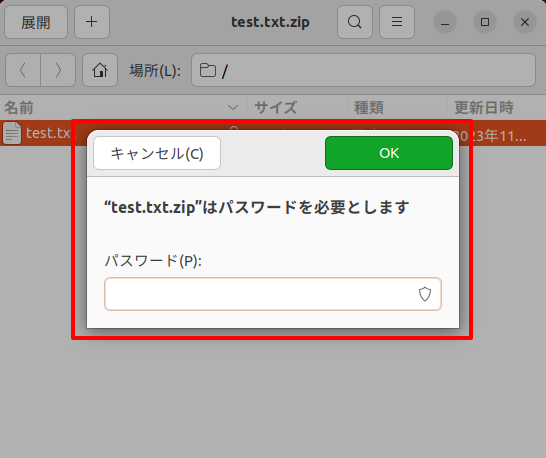
そして、パスワード(今回は「my-password」)を入力してみると・・・・・・

はい❗
ちゃんと中身をとりだすことができました。
成功です😄
では続いてファイル選択フォーム(ファイルを送信してStorage保存するパターン)です。
※ 今回は福崎町にあるお気に入りの唐揚げ「みのや」の写真を使ってやってみます。


うまくいくでしょうか・・・・・・
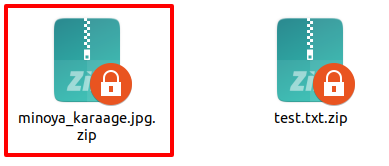
はい❗
先ほどのファイルの横に新しくファイルが作成されました。
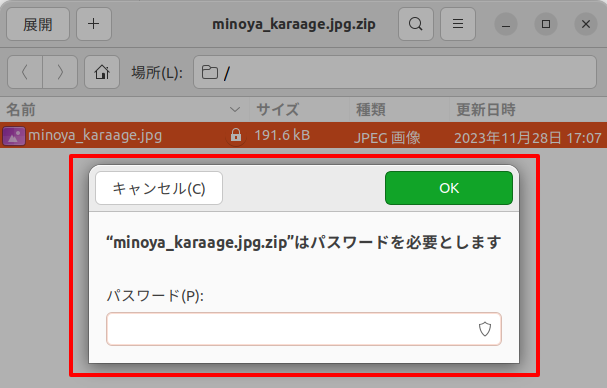
もちろんパスワードも有効になっています。(解除もできました)
すべて成功です✨😄👍
企業様へのご提案
今回は「パスワードつき zip ファイルの作成」でしたが、Storage機能を拡張するといろいろなことができます。
例えば、独自のクラウドを使っている場合やAWS、Google Cloudほど認知があるわけではないクラウドサービスを使っている場合でも、独自アダプターを作っておけばシンプルにファイルをアップロード&ダウンロードすることができるようになります。
また、最終更新日など位置情報など特殊なデータ追加なども対応できます。
もしそういった機能をご希望でしたらいつでもお気軽のお問い合わせからご相談ください。
お待ちしております。😄✨
おわりに
ということで、今回はStorageを拡張して「パスワード付き zip ファイル」が作成できるようにしてみました。
今回パスワードは「my-password」だったのでとても短いですが、重要なファイルの場合はもっと長く、複雑なものにしておけばよりセキュリティに強くなるでしょうし、そうなるときっと安心感も増えるんじゃないでしょうか。
※ ちなみに、もし量子コンピュータがジャンジャン使われるようになったらこの部分も対応が必要になってくるんでしょうね。科学の進歩は早いですから。
とはいえ、ぜひ皆さんもStorageを独自に拡張してみてくださいね。
ではでは〜❗
 「クライアントさん達への
お歳暮、何にしようかな…??」