
九保すこひです(フリーランスのITコンサルタント、エンジニア)
さてさて、これまで20年近くたくさんの社内システムを担当させていただきましたが、この前「そういえば確かに!」と思うことがありました。
それは・・・・・・
「チェックボックスがたくさんあると、ポチポチ面倒だね・・・・」
というもの。
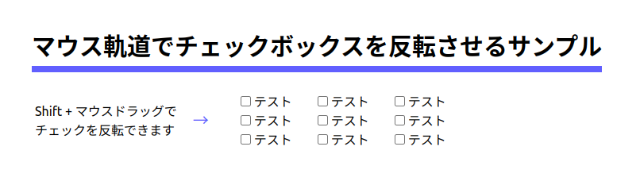
たとえば、以下のように選択肢がたくさんある場合ですね。
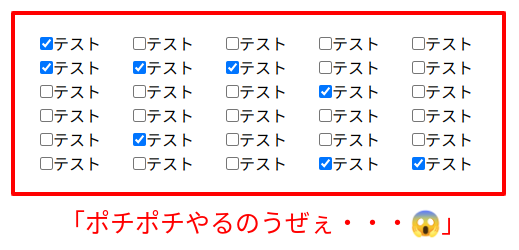
※実際の画面は出せませんが、いま開発中のシステムの選択肢は100どころの話ではないんです。。
そこで何か解決できるアイデアはないものかと考えていたところ、いま勉強中のIllustratorの「シェイプ形成ツール」を思い出しました。
シェイプ形成ツールは、マウスが通った場所にある図形の結合・削除できたりするんですが、この「マウス軌道」でチェックボックスを反転できればいいな、と思ったんです。
そこで!
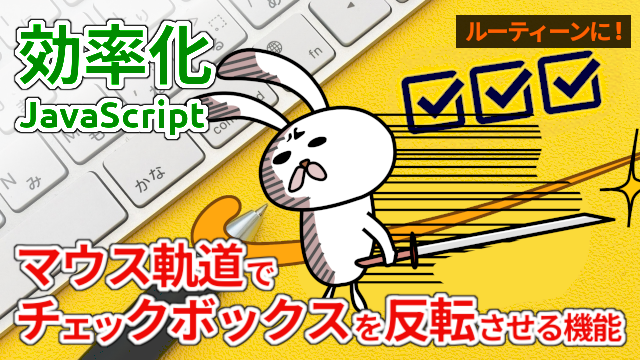
今回はJavaScriptを使って「チェックボックスを反転させる」機能をつくり、作業の効率化をしてみます。
「ESLintさん、これはホントに
見やすいのでしょうか・・・💦」
実現するための作戦

HTMLとJavaScriptを使って「マウス軌道でチェックボックスを反転させる機能」を実装するためには、以下のような手順をとります。
※コードが知りたい方は、次の項目まで読み飛ばしてください。
- 2つのブロック(チェックボックスのエリア、マウスドラッグのエリア)を用意する
- チェックボックスのエリアを下、マウスドラッグのエリアを上下に重ねる
- マウスドラッグされた位置をイベントで取得
- 同じ位置にあるチェックボックスのオン・オフを反転する
つまり、チェックボックスがあるエリアに透明な板をかぶせて、マウスが通った位置情報を取得するという流れです。
ちなみに、今回はチェックボックスの反転はコールバックで実装するようにします(汎用的に別の機能にも使えるようにしました😊)
実際のコード

今回は以下5つが特徴になっています。
- Vue、Reactは使わずNativeなJavaScriptでつくる
- TailwindCSSは使うけど、CDNで引っ張ってくる
- (繰り返しですが)汎用的に使えるようにクラス化する
- Shiftキーを押したときだけマウス軌道の入力が有効になる
- 対象になる要素は「data-ds」がついているものだけ
では、どうぞ!
【追記:2025.04.01】
いつもご支援いただいてるshirocakeさんがこちらのポストで指摘してくださったように、バグが発生する可能性があることがわかりました。
そのため、canvasを何度も作成せず、コンストラクタで1回だけつくるように変更しました。みなさん、いつもありがとうございます😊👍
<!DOCTYPE html>
<html lang="ja">
<head>
    <meta charset="UTF-8">
    <meta name="viewport" content="width=device-width, initial-scale=1.0">
    <title>マウス軌道でチェックボックスを反転させるサンプル(改)</title>
    <script src="https://cdn.jsdelivr.net/npm/@tailwindcss/browser@4"></script>
</head>
<body>
<div class="p-10">
    <h1 class="text-3xl font-bold mb-5">
        <span class="border-b-8 border-indigo-500 pb-2">マウス軌道でチェックボックスを反転させるサンプル(改)</span>
    </h1>
    <div class="flex items-center gap-5 px-1">
        <div>
            Shift + マウスドラッグで<br>
            チェックを反転できます
        </div>
        <div class="text-xl text-indigo-500">→</div>
        <div class="main">
            <!-- チェックボックスレイヤー -->
            <div id="container" class="p-5">
                <div class="flex gap-8">
                    <label data-ds>
                        <input type="checkbox" class="mr-1">テスト
                    </label>
                    <label data-ds>
                        <input type="checkbox" class="mr-1">テスト
                    </label>
                    <label data-ds>
                        <input type="checkbox" class="mr-1">テスト
                    </label>
                </div>
            </div>
        </div>
    </div>
</div>

<script>
    class DrawingSelector {
        constructor(el, options = {}) {
            this.containerElement = el;
            this.setOptions(options);

            // Data
            this.canvas = null;
            this.ctx = null;
            this.isDrawing = false;
            this.lastX = null;
            this.lastY = null;
            this.targetElements = [];

            // Initialize
            this.initCanvas();
            this.initKeyEvents();
            this.initMouseEvents();
        }

        // Initialize
        initCanvas() {
            this.canvas = document.createElement('canvas');
            this.canvas.style.position = 'absolute';
            this.canvas.style.top = '0px';
            this.canvas.style.left = '0px';
            this.setCanvasZIndex();
            document.body.appendChild(this.canvas);
            this.showCanvas(false);

            this.ctx = this.canvas.getContext('2d');
            this.canvas.style.background = this.options.drawing.backgroundColor;

            window.addEventListener('resize', () => this.resizeCanvas());
            this.resizeCanvas();
        }
        initKeyEvents() {
            document.addEventListener('keydown', (e) => this.handleKeyDown(e));
            document.addEventListener('keyup', (e) => this.handleKeyUp(e));
        }
        initMouseEvents() {
            this.canvas.addEventListener('mousedown', (e) => this.handleMouseDown(e));
            this.canvas.addEventListener('mousemove', (e) => this.handleMouseMove(e));
            this.canvas.addEventListener('mouseup', () => this.handleMouseUp());
        }
        setOptions(options) {
            const baseOptions = {
                drawing: {
                    backgroundColor: '#FFA5001A',
                    strokeColor: '#000',
                    strokeWidth: 2,
                },
                elements: {
                    borderColor: '#ff0000',
                    borderWidth: 2,
                },
                callbacks: {
                    onDraw(elements) {},
                    onEnd(elements) {}
                }
            };
            this.options = { ...baseOptions, ...options };
        }

        // Document and window
        handleKeyDown(e) {
            if (e.key === 'Shift') {
                this.showCanvas(true);
            }
        }
        handleKeyUp(e) {
            if (e.key === 'Shift') {
                this.showCanvas(false);
                this.handleMouseUp();
            }
        }

        // Canvas
        resizeCanvas() {
            const rect = this.containerElement.getBoundingClientRect();
            this.canvas.width = rect.width;
            this.canvas.height = rect.height;

            this.canvas.style.top = `${rect.top}px`;
            this.canvas.style.left = `${rect.left}px`;
        }
        showCanvas(boolean) {
            this.canvas.style.visibility = boolean ? 'visible' : 'hidden';
        }
        drawElementBorder() {
            const borderColor = this.options.elements.borderColor;
            const borderWidth = this.options.elements.borderWidth;
            if(borderColor && borderWidth) {
                this.targetElements.forEach((element) => {
                    const rect = element.getBoundingClientRect();
                    this.ctx.beginPath();
                    this.ctx.rect(rect.left - this.canvas.offsetLeft, rect.top - this.canvas.offsetTop, rect.width, rect.height);
                    this.ctx.strokeStyle = borderColor;
                    this.ctx.lineWidth = borderWidth;
                    this.ctx.stroke();
                });
            }
        }
        setCanvasZIndex() {
            const containerZIndex = window.getComputedStyle(this.containerElement).zIndex;
            this.canvas.style.zIndex = (containerZIndex === 'auto')
                ? '1'
                : (Number(containerZIndex) + 1).toString();
        }
        handleMouseDown(e) {
            if (e.shiftKey) {
                this.isDrawing = true;
                const rect = this.canvas.getBoundingClientRect();
                const x = e.clientX - rect.left;
                const y = e.clientY - rect.top;
                [this.lastX, this.lastY] = [x, y];
                this.targetElements = [];
            }
        }
        handleMouseMove(e) {
            if (this.isDrawing && e.shiftKey) {
                const rect = this.canvas.getBoundingClientRect();
                const x = e.clientX - rect.left;
                const y = e.clientY - rect.top;

                if (this.lastX !== x || this.lastY !== y) {
                    this.ctx.beginPath();
                    this.ctx.moveTo(this.lastX, this.lastY);
                    this.ctx.lineTo(x, y);
                    this.ctx.strokeStyle = this.options.drawing.strokeColor;
                    this.ctx.lineWidth = this.options.drawing.strokeWidth;
                    this.ctx.stroke();
                }

                this.showCanvas(false);

                // Get the elements under the cursor
                const hoverElement = document.elementFromPoint(e.clientX, e.clientY);
                if (hoverElement && hoverElement.hasAttribute('data-ds') && ! this.targetElements.includes(hoverElement)) {
                    this.targetElements.push(hoverElement);
                }

                this.showCanvas(true);
                this.drawElementBorder();

                [this.lastX, this.lastY] = [x, y];

                const callback = this.options.callbacks.onDraw;
                if (typeof callback === 'function') {
                    callback(this.targetElements);
                }
            }
        }
        handleMouseUp() {
            if (this.isDrawing) {
                this.isDrawing = false;
                const callback = this.options.callbacks.onEnd;

                if(typeof callback === 'function') {
                    callback(this.targetElements);
                }

                this.targetElements = [];
                this.ctx.clearRect(0, 0, this.canvas.width, this.canvas.height);
            }
        }
    }

    window.addEventListener('load', () => {

        const containerElement = document.getElementById('container');
        const options = {
            drawing: {
                backgroundColor: '#FFA5001A',
                strokeColor: '#44444D',
                strokeWidth: 3,
            },
            elements: {
                borderColor: '#D21B49',
                borderWidth: 2,
            },
            callbacks: {
                onDraw(elements) {
                    console.log(elements);
                },
                onEnd(elements) {
                    // チェックボックスを反転
                    elements.forEach((element) => {
                        const checkbox = element.querySelector('input[type="checkbox"]');
                        if (checkbox) {
                            checkbox.checked = ! checkbox.checked;
                        }
                        // Vue の場合はinputイベントを発火すべきです
                    });
                }
            }
        };
        new DrawingSelector(containerElement, options);

    });
</script>
</body>
</html>
では、今回はJavaScriptクラス「DrawingSelector」の中身を詳しく紹介していきましょう!
コンストラクタ、初期化のブロック
コンストラクタの中では、以下8つのメンバ変数を作っています。
- containerElement:対象にする要素
- options:好みで変更できるパラメータ(※詳しくは後で紹介)
- canvas:canvas要素
- ctx:canvasの操作に必要な変数
- isDrawing:いま描画中かどうかのフラグ
- lastX:最後にマウスがいた場所(X軸)
- lastY:最後にマウスがいた場所(Y軸)
- targetElements:マウス軌道上にあった要素(コールバック関数で返す)
オプションは以下のようになっています。
| drawing.backgroundColor | Shiftを押した時にハイライトされる色。今回でいうと「container」の背景色。 |
| drawing.strokeColor | マウス軌道の線(色) |
| drawing.strokeWidth | マウス軌道の線(太さ) |
| elements.borderColor | マウス軌道によって選択された要素の枠線(色) |
| elements.borderWidth | マウス軌道によって選択された要素の枠線(太さ) |
| callbacks.onDraw | マウス軌道が描画されているときに実行されるイベント(リアルタイム) |
| callbacks.onEnd | マウス軌道の描画が終わったときに実行されるイベント |
ちなみに、コードではoptionsは基準となるパラメータがあり、もしユーザーが同じものをセットしたら上書きされるよう、スプレッド構文で書いています。
this.options = { ...baseOptions, ...options };
DocumentとWindow(キーイベント)のブロック
今回「ページ全体」のために必要になったのが、以下3つのイベントです。
- Shiftキーが押されたとき
- Shiftキーが離されたとき
- ウィンドウのサイズが変わったとき
そして、これらを実装するためにつくったのが「handleKeyDown」と「handleKeyUp」です。
流れとしては、
- Shiftキーが押されたら、Canvas要素をつくる
- キャンバス要素を「コンストラクタで指定された要素」と同じ大きさにして上に重ねる
- (ここでマウス軌道を描画)
- Shiftが離れたらキャンバスを削除して初期状態へ戻す
となっています。
キャンバス(マウスイベント)のブロック
このブロックが今回のメイン部分です。
流れは以下のとおり。
- Shiftを押しながらマウスドラッグされたら、マウス軌道を描画
- マウスの真下にある要素を取得
- もしdata-dsがついていたら、選択された要素としてデータに貯める
- Shiftが離されたら、溜まっている選択要素をコールバック関数へ送る
ちなみに、今回のコードを書いていてはじめて「elementFromPoint」というものがJavaScriptにあることをしりました。
関数名のとおり、位置情報から要素を取得するという便利なものです。
ただし、これには注意が必要です。
なぜなら、キャンバスを透明な板として用意しているので、elementFromPointを使うと取得できるのは毎回canvasとなってしまうからですね。
そのため、直前にshowCanvasを使ってキャンバスを非表示にし、処理が終わったら元に戻すようにしています。
使い方
コードのとおりですが、使い方です。
といっても、とてもシンプルでターゲットの要素とオプションをセットしてインスタンス化するだけです。
new DrawingSelector(containerElement, options);
簡単ですね👍
そして、今回実装したかった「チェックボックスを反転させる」部分がオプションの中にある「onEnd」です。
onDraw、onEndはマウス軌道の下にある要素すべてを引数として用意してくれるので、それらをループさせ、ひとつずつチェックのオン・オフを切り替えています。
パッケージとして公開しました!
謎のモチベーションがもちあがったので、久しぶりにnpmへパッケージ公開することにしました。
名前はそのままDrawingSelectorです。
MITなので、気が向いたら使ってみてください😊
テストしてみる(デモページ)

では、実際にテストといきたいところですが、サンプルページを用意したので、ぜひご自身で試してみてください。
【サンプル】マウス軌道でチェックボックスを反転させるサンプル
企業様へのご提案
今回のような「この作業めんどうだな・・・ショートカットしたいな(切実)」という方はぜひご相談ください。
日々繰り返すルーティーンワークを1分だけでもショートカットできたら、年間でいうと膨大な時短につながります。
また、作業内容が少なくなれば支払う給与を実質的に減らすことになるわけですね。
そのため、もしウェブのシステムをつかって効率化をお考えでしたら、ぜひどんなことでも結構ですのでお問い合わせください。
お待ちしております!
おわりに

ということで、「マウス軌道をつかって作業を効率化する」機能をつくってみました。
ちなみに今回実感したことは、
「まったく違う分野の勉強が生きてくることがある!」
というものでした。
今回のアイデアのスタート地点は、「Illustratorのシェイプ形成ツール、便利だなぁ!」だったからですね。
正直たくさん勉強したものの中には、このあと一生使わないスキルやテクニックもあるでしょうが、弱者の戦略「下手な鉄砲も数打ちゃ当たる」方式で、着実に前進しているのを実感しています。
ぜひ皆さんも、Aの知識 × Bの知識で新しいものをつくってみてくださいね。
ではでは〜!
「友人に連れられて、人生初の
モーターショー行ってきました!」